Tips: How to Update Windows 10 to Windows 11 on unsupported hardware
This method allows you to upgrade from Windows 10 to Windows 11 without editing the registry or using third-party applications.
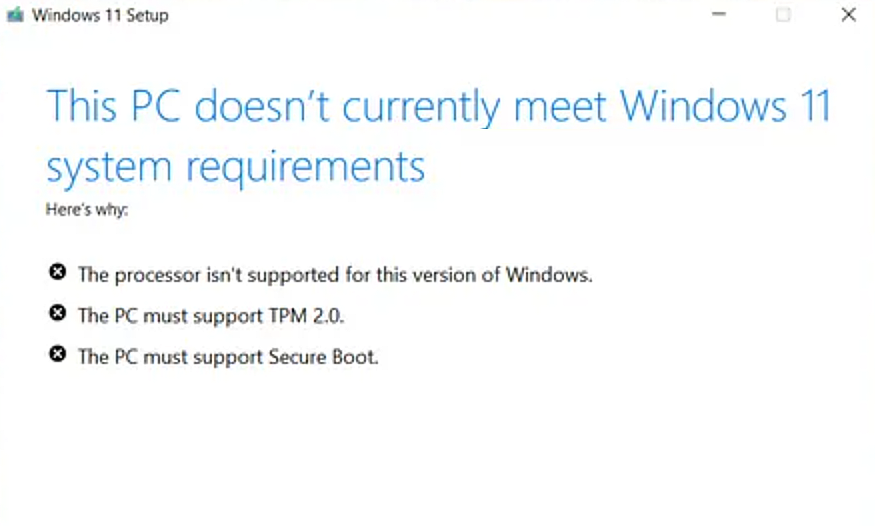
Microsoft does not officially support upgrades on unsupported hardware, and future updates may be affected.
To proceed, you must be using a computer with a valid Windows 10 license and signed in with a Microsoft account.
Step 1: Download lastest Windows 11 ISO
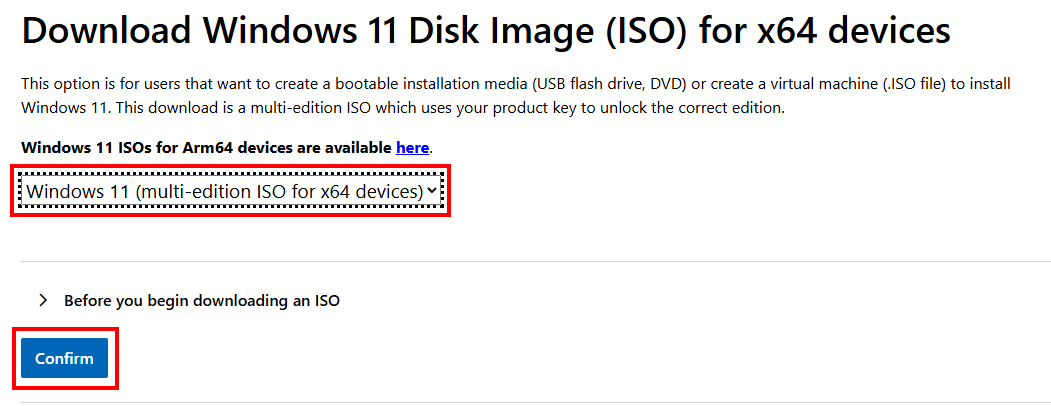
Go to the official Microsoft download page:
https://www.microsoft.com/en-us/software-download/windows11
Next, locate the section shown in the image, select your preferred Windows 11 edition, and click “Confirm”. After that, choose your language and you'll be provided with a link to download the ISO file.
Step 2: Upgrade Windows 10 to Windows 11
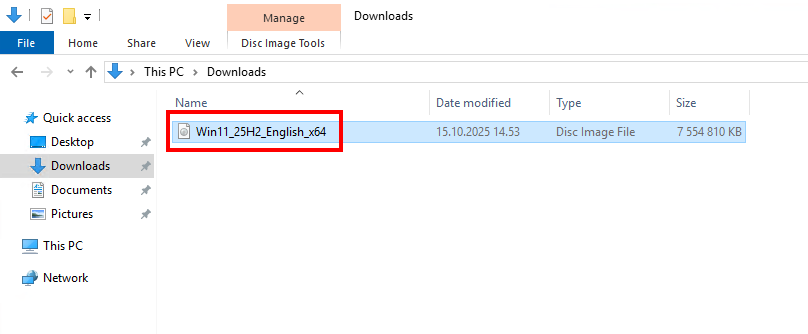
Locate the ISO file you downloaded and double-click it. This will automatically mount the image as a CD-drive, and open a new window that shows the contents of the mounted ISO folder.
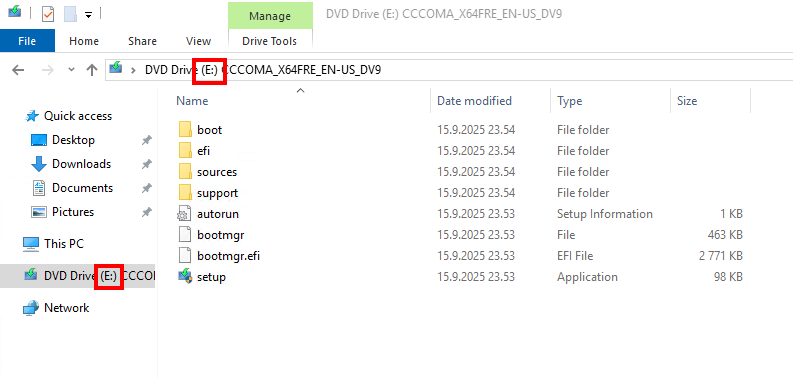
After mounting the ISO, note the drive letter assigned to it, for example, "E". You’ll need it in the next step.
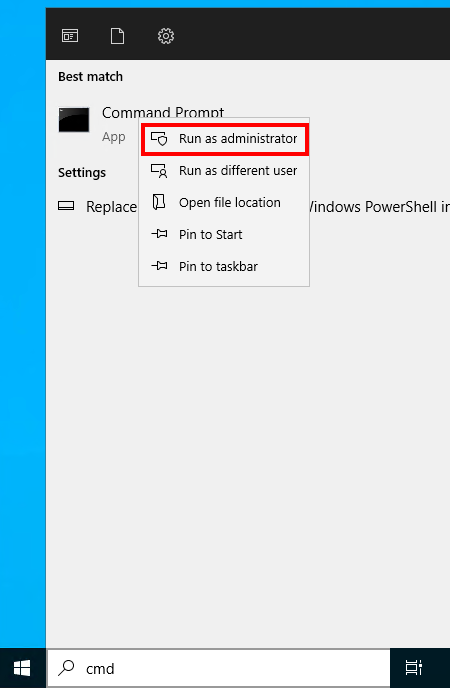
Open Command Prompt with administrator privileges:
- Click the Start menu and type cmd into the search bar.
- In the search results, right-click “Command Prompt” and select “Run as administrator.”
Now you can start setup with bypass. Run the following command in Command Prompt.
E:\setup.exe /product server
Remember check and replace "E" with the drive letter of your mounted ISO image assigned letter.
This command helps bypass TPM, Secure Boot, and other hardware restrictions that normally prevent Windows 11 from installing on unsupported devices
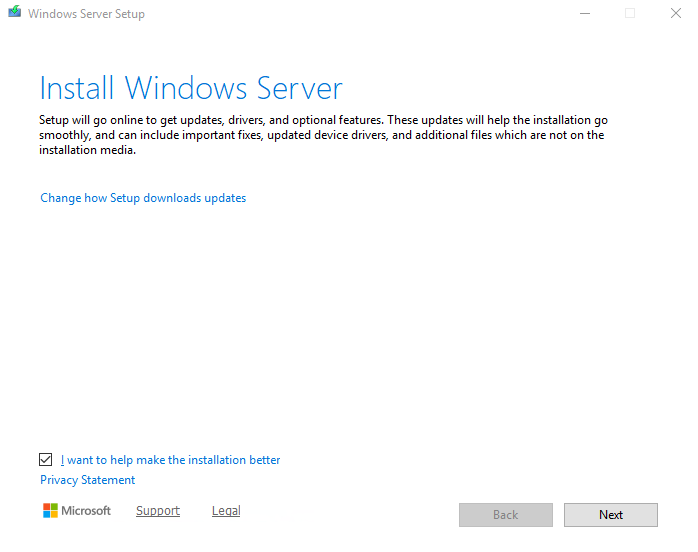
When the Windows setup screen appears and shows “Install Windows Server” it confirms that the bypass method is working as intended.
The installation will still apply Windows 11, even though the interface shows Windows Server on setup process.

Member discussion